Flooring Works & Installation for Modern Spaces
Modern spaces require flooring that suits daily use and local conditions. Each site brings its own surface condition and layout challenges. Clients often focus on colour and pattern, but the base surface and preparation stages decide how the floor performs over time.
During the first visit, Flooring Works planning usually begins with surface checks and room measurements. This early step helps the team understand levels, moisture, and movement areas before any material arrives on site.
Understanding the Core Process
Daily Service Workflow
A normal day starts with material checks and site preparation. The crew reviews room dimensions and confirms the layout plan. For example, during a Marble flooring installation, the team marks the centre lines and checks level points before mixing adhesive.
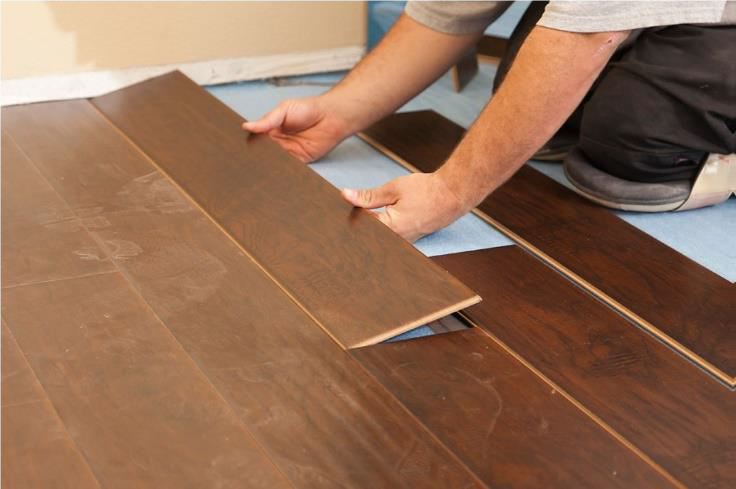
Later in the day, the crew moves to cutting and placement. When handling Wooden & parquet flooring, the team leaves small gaps near walls to allow natural movement. This avoids lifting or bending when temperature or moisture changes.
Why Minor Issues Go Unnoticed
Small problems often appear during early preparation. Slight uneven patches or trapped dust may not seem serious at first. However, these small points can affect bonding and cause lifting after some months of daily use.
In many homes, furniture is moved back quickly after installation. With Tile and vinyl floor services, early foot traffic or heavy items can press down weak spots. This makes small gaps wider and creates long term repair needs.
Accuracy Checks and Quality Control
Common Operational Errors
One common mistake is skipping proper surface cleaning. Dust or loose particles reduce the strength of adhesives. Another issue is poor timing between mixing and placing materials, which weakens bonding across the surface.
Incorrect spacing is another problem seen on busy sites. Without steady checks, tiles or planks may drift from the alignment lines. This creates visible pattern shifts and forces extra cutting later in the process.
Importance of Records and Proof
Good records help teams track material batches, timing, and room measurements. Written notes also confirm who handled each stage of the job. This prevents confusion when clients ask about progress or future maintenance.
Photo records and moisture readings support proper Floor preparation and finishing. These details show that the surface was clean, level, and dry before installation. Clear records also help during warranty or inspection visits.
Where Operational Losses Actually Occur
Hidden Time and Cost Losses
Losses often start during transport and material handling. Damaged boxes or incorrect quantities slow down the entire job. Workers then spend extra hours adjusting layouts or waiting for replacement stock.
Another loss appears during cutting stages. When measurements are rushed, off cuts increase. This wastes material and forces extra purchases, which adds cost for both the contractor and the client.
Example Scenarios
On one site, a delayed delivery caused the crew to wait for three hours. The team then rushed placement to meet the schedule. The result was uneven joints that required extra grinding the next day.
In another home, moisture readings were skipped. After two weeks, the planks lifted at the corners. The crew had to remove the affected area and start again, which doubled labour time.
A third case involved a client changing room furniture during Durable flooring options selection. The layout plan changed, and extra cutting was needed. This caused material shortage and an additional order.
Steps to Review Workflow Effectiveness
Intake and Coordination Review
Every project begins with a booking call and a site visit. The team notes room sizes, surface condition, and client preferences. Clear planning helps avoid material shortages and unexpected delays.
Internal coordination is also important. The store, transport, and site teams must share the same schedule. When delivery and labour timing match, the work flows smoothly and avoids wasted hours.
Completion Verification and Follow Up
After installation, the crew checks alignment, joints, and edge gaps. They clean the surface and inspect for hollow sounds or loose spots. This final step confirms that the floor is safe for daily use.
A follow up visit may occur after one week. This helps detect early movement or moisture signs. Small adjustments at this stage prevent larger repairs in the future.
Ongoing Operational Support Practices
Internal Reviews and Spot Checks
Supervisors carry out regular checks during active projects. They observe surface levels, adhesive spread, and placement patterns. These spot checks help correct issues before they spread across the room.
Internal reviews also focus on timing. If one stage takes longer than planned, the schedule is adjusted. This avoids rushed work and keeps the installation quality stable.
Staff Process Updates
Workers attend refresher sessions to review safety steps and placement methods. These sessions remind staff about correct mixing ratios, spacing, and cleaning routines.
Process updates also include new materials or tools. When teams stay informed, they handle changes without confusion and maintain steady results on site.
Compliance and Standards Overview
Purpose of Industry Standards
Standards exist to protect both the client and the worker. They guide surface preparation, material storage, and installation timing. Following these rules ensures the floor remains stable for many years.
Standards also create clear expectations. Clients know what finish level to expect, and workers know the correct procedures. This reduces disputes and keeps projects organised.
Consequences of Non Compliance
Ignoring standards often leads to early damage. Floors may lift, crack, or lose alignment within months. Repair work then costs more than proper installation would have.
Non compliance also affects safety. Uneven surfaces or loose sections increase the risk of slips or falls. This creates liability concerns for both property owners and contractors.
Conclusion
Stable results depend on steady preparation, clear records, and regular checks. Each stage supports the next, from planning to final inspection. Careful Flooring Works help prevent hidden damage and reduce long term repair needs.
FAQs
How long does a standard floor installation take
Most rooms are completed within one to three days. Timing depends on surface condition and material type. Extra drying time may be needed after preparation.
Why is surface preparation important
Preparation removes dust and uneven spots. This helps the adhesive bond properly. Without it, floors may lift or crack early.
When can furniture be placed back on the floor
Light furniture can return after twenty four hours. Heavy items should wait forty eight hours. This protects the bonding stage.
Do all floors need expansion gaps
Yes, most materials expand with temperature or moisture. Small gaps near walls allow safe movement and prevent lifting.
How often should floors be inspected
A simple visual check every six months is enough. Look for gaps, hollow sounds, or moisture signs near edges